
- Like
- SHARE
- Digg
- Del
- Tumblr
- VKontakte
- Flattr
- Buffer
- Love This
- Save
- Odnoklassniki
- Meneame
- Blogger
- Amazon
- Yahoo Mail
- Gmail
- AOL
- Newsvine
- HackerNews
- Evernote
- MySpace
- Mail.ru
- Viadeo
- Line
- Comments
- Yummly
- SMS
- Viber
- Telegram
- JOIN
- Skype
- Facebook Messenger
- Kakao
- LiveJournal
- Yammer
- Edgar
- Fintel
- Mix
- Instapaper
- Copy Link
Lemon desserts are always a hit. They’re light, tangy, sweet, and make the perfect little “something” when you want a little something. This recipe for the best gluten-free lemon bars really is perfect because you’re getting a triple whammy of that lemony flavor you love. That’s right, there’s lemon in the shortbread crust, there’s lemon in the creamy tart filling, and there’s even lemon infused into the whipped cream topping. Lemon from head to toe!
If life gives you lemons, make this gluten-free lemon bar recipe!
Lemon bars are one of those treats that everyone loves. Just ask! We have yet to find anyone who would turn down a lemon bar, with all its balanced tart and sweet goodness, creamy texture, and delicious shortbread crust. And now that you have a recipe at your fingertips for the perfect gluten-free lemon bars, (plus an option to make them dairy-free lemon bars), even more people can enjoy this heavenly baked good that’s so easy to make.
We think this easy lemon bar recipe is just right for Easter and Mother’s Day, year-round family gatherings, baby and bridal showers, or taking to a friend, bringing to the office, and just to make any week better.
Ingredients to make gluten-free lemon bars
- Gluten-free flour – we like Bob’s Red Mill One-to-One Gluten-Free Baking Flour or King Arthur Measure-for-Measure Gluten-Free Flour. You can also use regular all-purpose flour if you don’t need or want lemon bars that are gluten free
- Granulated sugar
- Fresh lemons – you’ll need 5 to 6 lemons total that you’ll use for the juice and zest
- Butter – you can also use coconut oil to make these dairy free
- Eggs
- Cornstarch – can substitute arrowroot powder
That’s it! If you want to make the lemon whipped topping (which we highly recommend), then you’ll also need heavy cream and powdered sugar.
Shop Thrive Market to get the best prices on natural, organic, and specialty foods. PLUS get a free gift valued at $24 when you sign-up! Shop Thrive Market for all of your baking essentials!
How to make gluten-free lemon bars
Start by making the shortbread crust. Ours is incredibly simple. The hardest part, really, is having patience for the dough to come together in your hands. When you first mix the flour, sugar, salt, lemon zest, and butter it will be quite crumbly. You need to keep working it with your hands until it forms a dough ball, which WILL happen. The warmth of your hands melts and helps distribute the butter. Next, press the shortbread crust into the pan. Again, this takes some patience as you gently work the dough to the edges of the pan in an even layer.
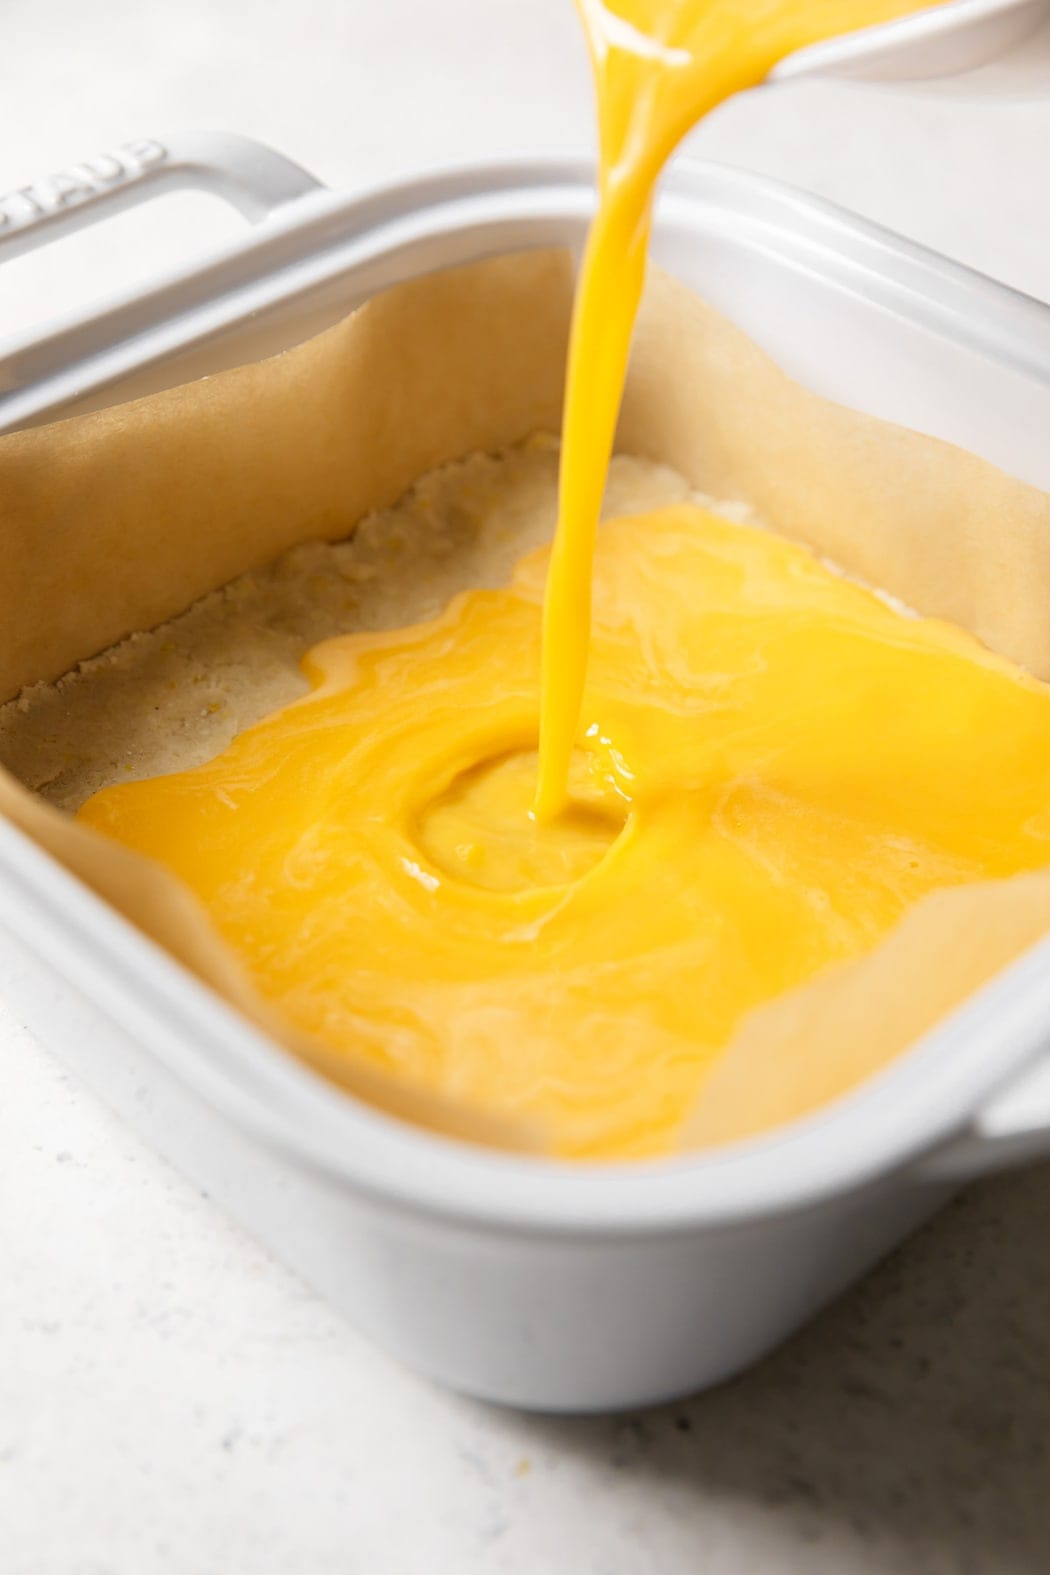
Bake the crust for 5 minutes, just enough time for it to start to set before you add the lemon filling. The filling is made by mixing eggs, sugar, lemon juice, cornstarch, and lemon zest. Pour this filling over the par-baked crust and then return it all to the oven for 30 minutes.

Tips for making perfect lemon bars every time
The pan: You can make these lemon bars in an 8-inch square or 9-inch square glass or ceramic pan. We don’t recommend using a metal baking dish as that can make the crust too dark and can impart a metallic taste. If you have one, we think the 8-inch pan is better because it will make your filling taller and achieve a 2-to-1 filling-to-crust ratio.
The filling: To get a perfectly smooth filling layer, we recommend straining the filling mixture through a fine-mesh sieve to remove any bits of egg or sugar that are too large. Then, after straining, stir in the lemon zest so you still get all that lemony good flavor in there.
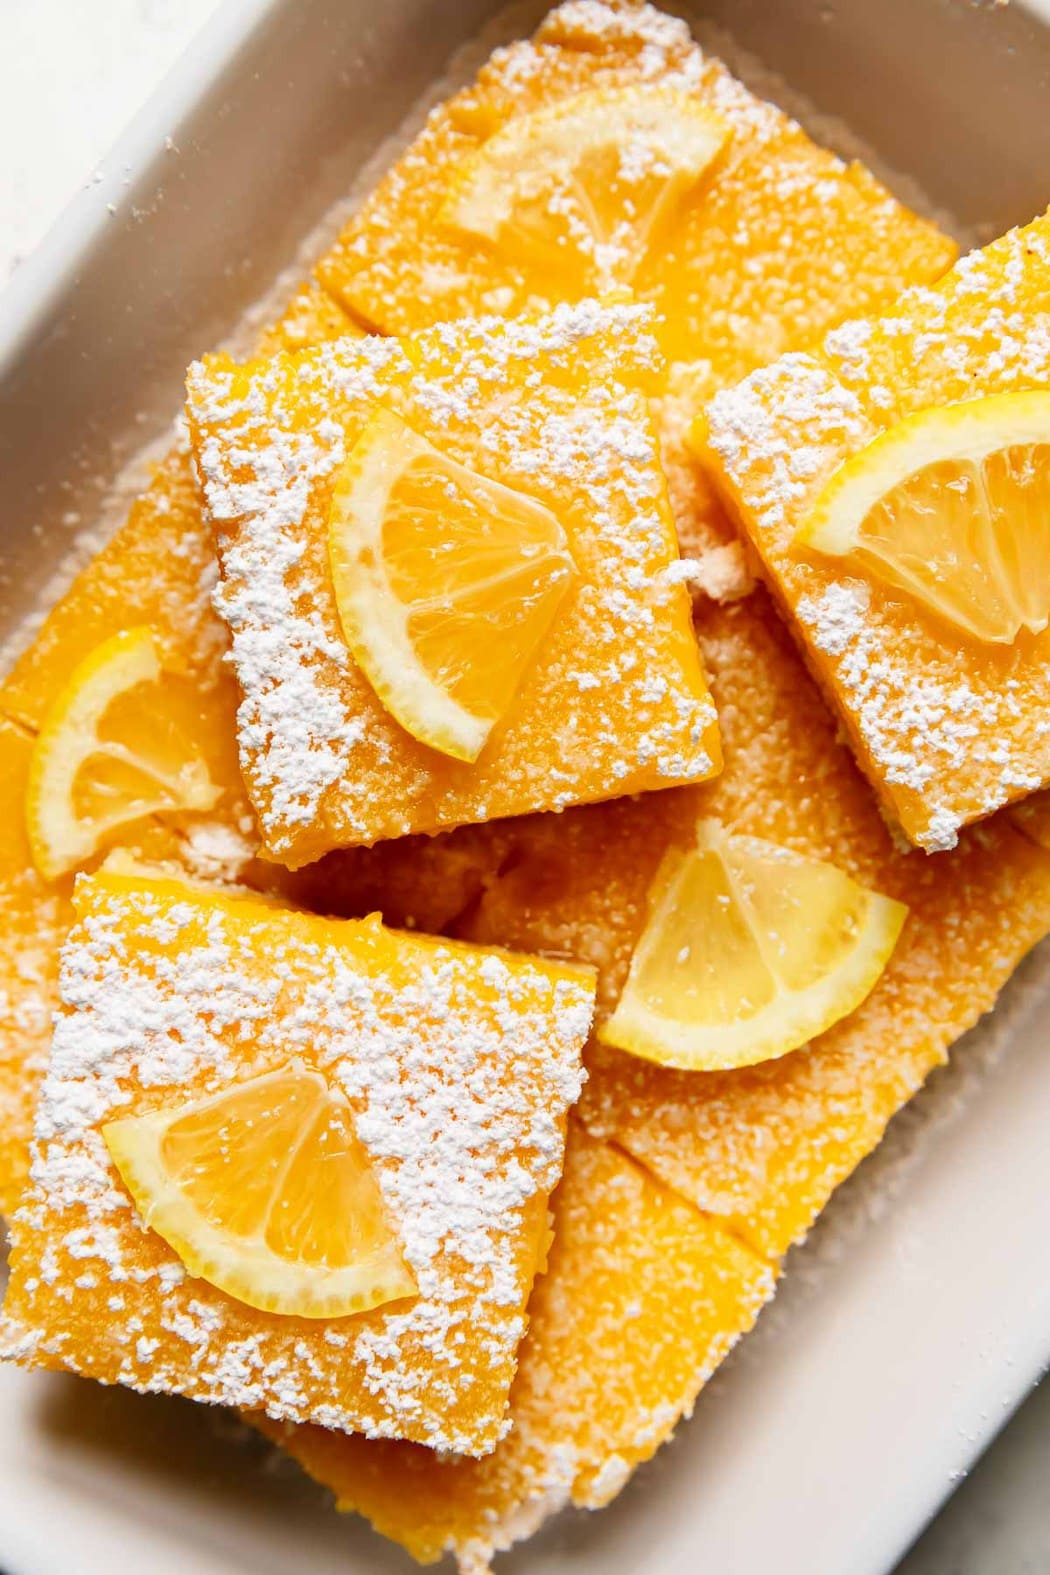
The edges: To get perfect edges and uniform squares, it helps to line the pan with parchment so you can lift the entire slab of bars out of the pan and onto a large cutting board. Then, use a Chef’s knife to cut the very outer edge off of each side (about 1/8-inch per side) of the slab before cutting into 16 even lemon squares.
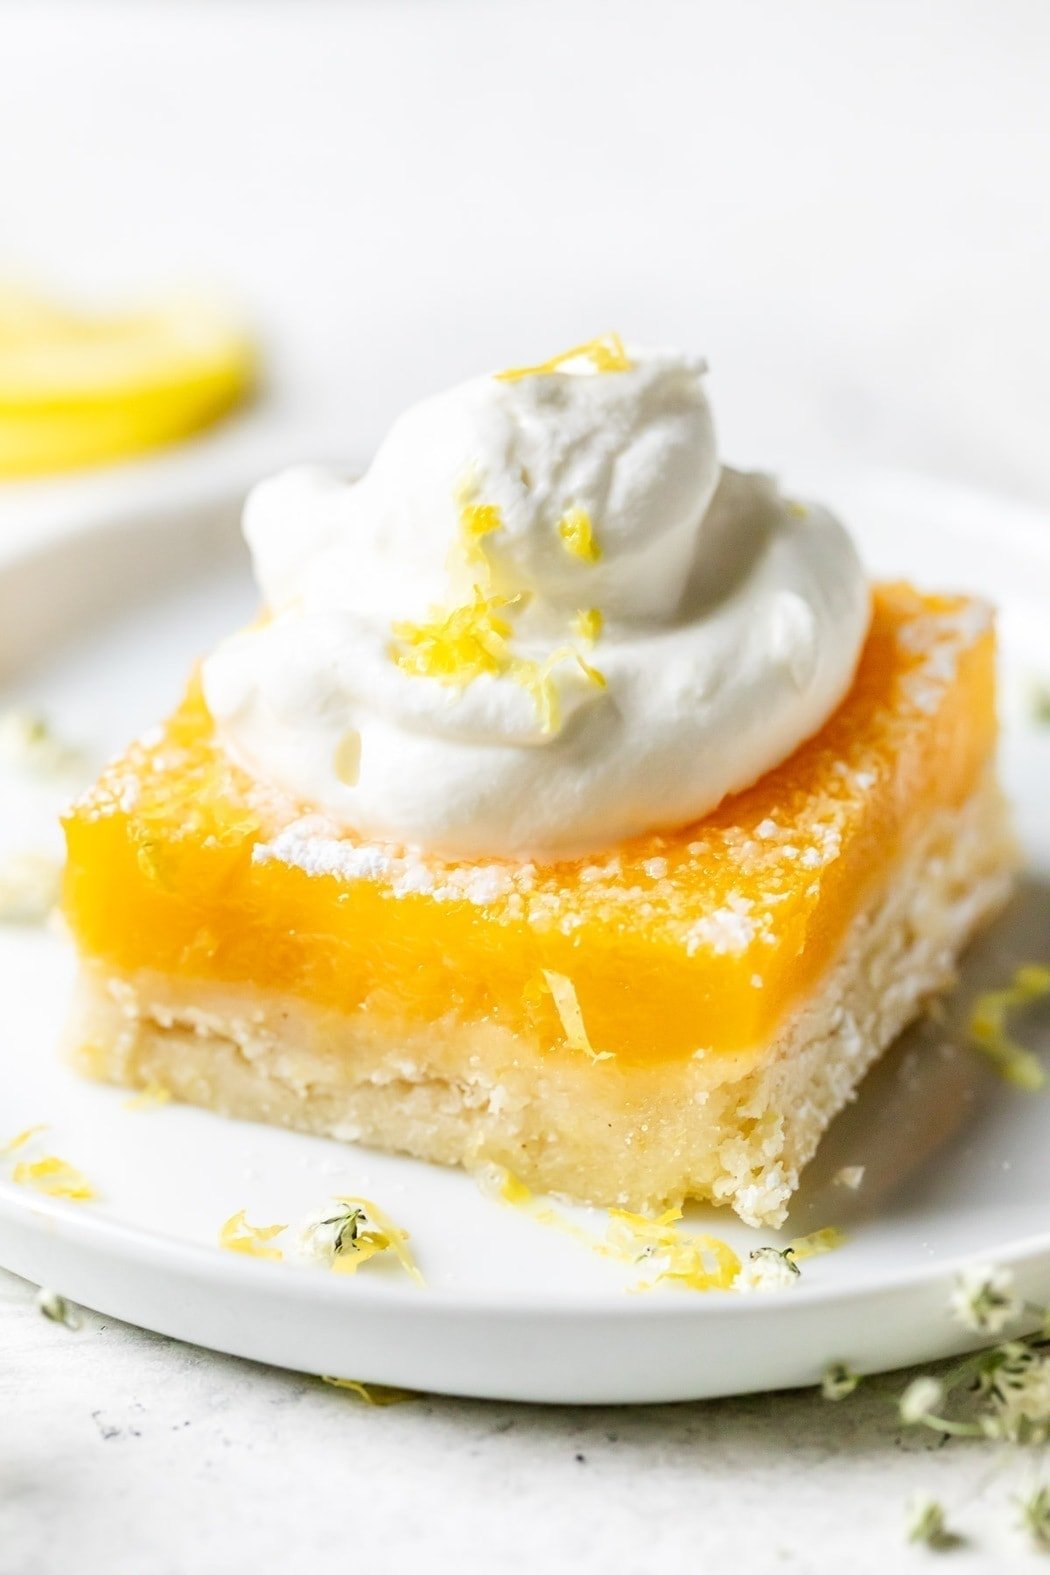
The topping: This recipe also includes an option for making homemade lemon whipped topping, which adds a nice finish and light, creamy balance to the lemon bars. To make the topping, infuse heavy cream with lemon zest for several hours in the refrigerator, then whip the cream into soft peaks and add a dollop on top of each bar. You can also top these perfect lemon bars with a dusting of powdered sugar or a small slice of lemon.

How to store this lemon bar recipe:
The baked bars will store well in the refrigerator for up to one week. The whipped topping can be made up to 24 hours ahead and refrigerated, then re-whisk before serving. However, we do not recommend freezing lemon bars as the filling will break down over time.
Other delicious lemon desserts to try
Paleo Lemon Poppy Seed Cookies
Gluten-Free Lemon Shortbread Cookies
Hungry for More? Subscribe to get our newsletter delivered straight to your inbox! And be sure to stay in touch on Facebook, Twitter, Pinterest and Instagram for all of the latest updates.
Let’s Get Cookin’
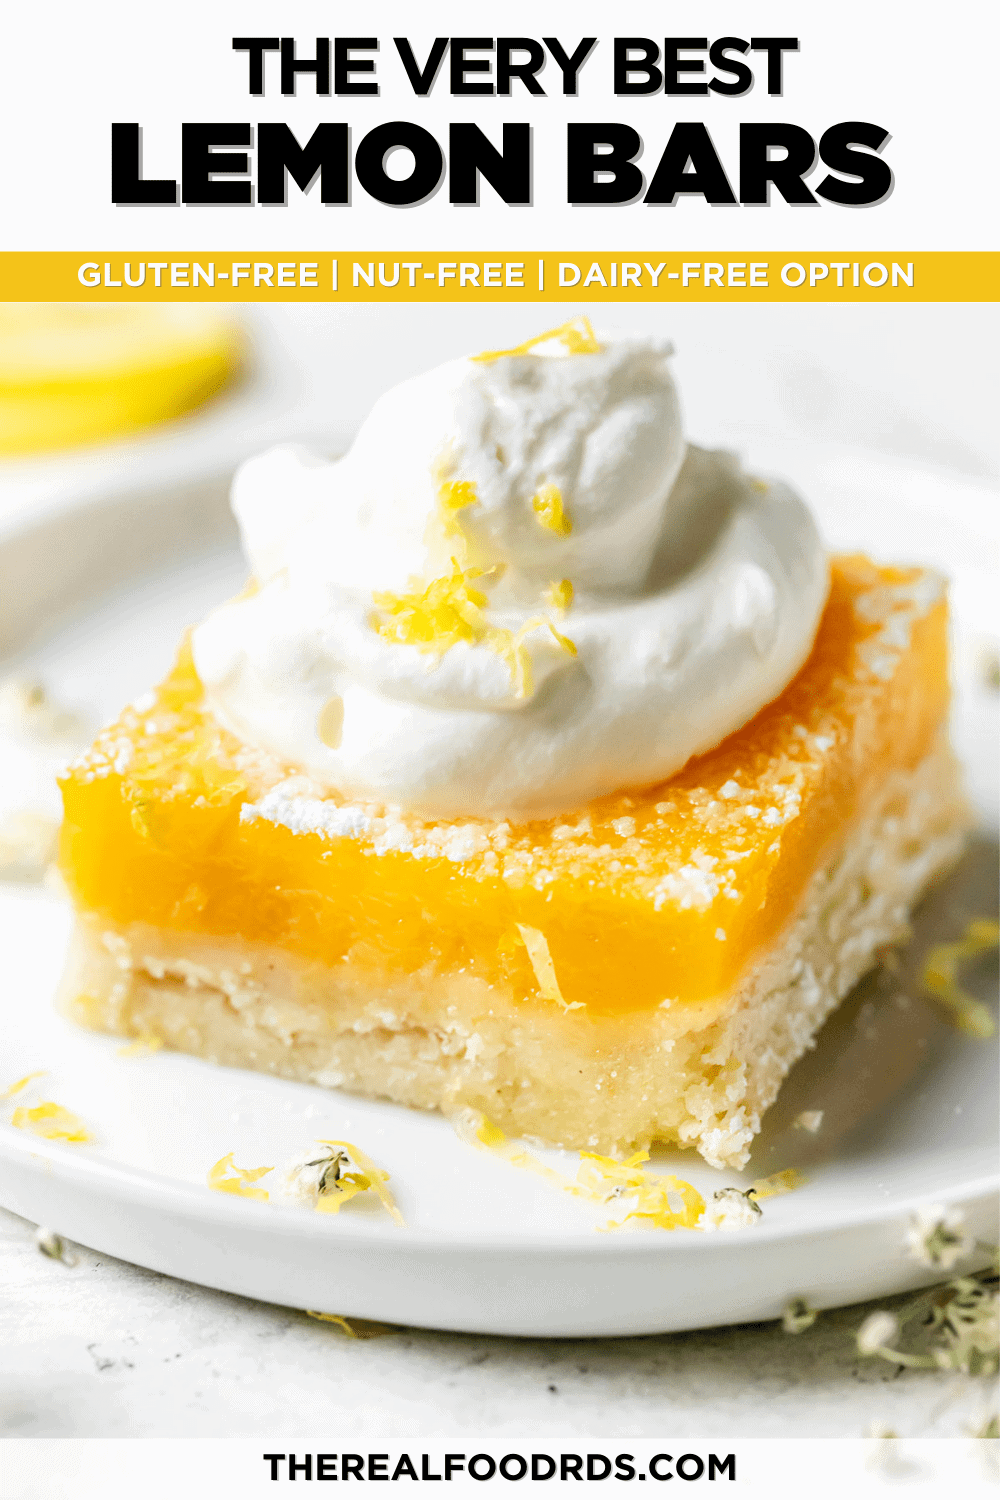
The Best Gluten-Free Lemon Bars
- Author: Jessie Shafer
- Prep Time: 20 mins
- Cook Time: 35 mins
- Total Time: 55 minutes
- Yield: 16 squares 1x

Ingredients
For the Crust
- 1 cup gluten-free flour*
- 6 tablespoons granulated sugar
- Pinch of salt
- Zest of 1 lemon (about 1 tablespoon)
- 6 tablespoons butter, softened**
For the Filling
- 4 eggs
- 1 cup granulated sugar
- ¼ cup cornstarch
- ½ cup fresh lemon juice (from 3–4 lemons)
- Zest of 1 lemon (about 1 tablespoon)
- Optional toppings: Lemon Whipped Cream, powdered sugar, thin lemon wedges, or lemon peels
For the Lemon Whipped Cream (optional)
- 1 cup heavy whipping cream
- Zest of 1 lemon (about 1 tablespoon)
- 1 tablespoon powdered sugar
Instructions
- Preheat the oven to 350 degrees. Line an ungreased 8×8-inch glass baking dish with crossing strips of parchment, which will make it easier for you to lift the lemon bars out of the dish after baking.
- In a mixing bowl or the bowl of a stand mixer with paddle attachment, combine flour, sugar, salt, and lemon zest; mix gently until combined. Add butter and mix until the dough is crumbly (it will not come all the way together yet). Next, use your hands to knead the dough until it comes together in a ball. This will take some time, so be patient. The dough will come together as the warmth of your hands lightly melts the butter.
- Press the dough into the prepared baking dish over the parchment strips. Again, be patient as you work the dough into an even layer. Make the layer as even as possible, without any rise at the edges, patting it down with your fingers. Bake for 5 minutes and then remove to cool slightly while you prepare the filling. This short baking time just helps to start setting the crust, but it will not be fully baked yet.
- Meanwhile, make the filling. In a separate bowl, combine the eggs, granulated sugar, cornstarch, and lemon juice (not the lemon zest yet). Mix until the sugar and cornstarch are dissolved. Strain the mixture through a sieve (this step is not necessary, but makes for a very smooth and nice-looking filling). Stir the lemon zest in and gently pour the filling over the par-baked crust. Return to the oven and bake for 30 minutes without opening the oven.
- Remove baking dish from oven and let bars cool 15 minutes in the pan. Run a knife around the outer edge of the parchment, and very gently lift up on the parchment flaps to remove the full slab to a cutting board. If you prefer perfect squares, use a Chef’s knife to cut off the outer 1/8-inch edge on all four sides, then cut into 16 squares. Refrigerate bars at least 1 hour before serving, then top with desired garnishes. Store any leftovers in the refrigerator for up to 1 week.
How to Make Lemon-Infused Whipped Cream: 8 to 24 hours before serving, add 1 tablespoon lemon zest to the heavy cream (you can add the zest right to the heavy cream container; close and store in the refrigerator). Before serving, in a stand mixer or hand-held mixer with whisk attachment, combine the lemon-flavored heavy cream and powdered sugar. Whip until soft peaks form. Serve immediately or store in the coldest part of the refrigerator for up to 4 hours before serving; may need to re-whip before serving.
Notes
* You can use the same amount of regular all-purpose flour for the gluten-free flour if you don’t want or need gluten-free lemon bars. For gluten-free flour options, we like Bob’s Red Mill Gluten-Free 1-for-1 Baking Flour, and King Arthur Gluten-Free Measure-for-Measure Flour Blend.
**To make these lemon bars dairy free, skip the whipped topping and sub 6 tablespoons solid coconut oil for the butter in the crust. You’ll need to work the dough a little more with your hands, because it will be crumbly at first, but it will eventually come into a dough ball with patience. If using coconut oil, press the dough into the pan and then chill in the refrigerator for 30 minutes before baking. Also, par-bake the crust for 10 minutes instead of 5 minutes.
Pin It Now, Make It Later!
All photos and content are copyright protected. Please do not use our photos without prior written permission. If you wish to republish this recipe, please rewrite the recipe in your own unique words and link back to the source recipe here on The Real Food Dietitians. Thank you!
Photo Credit: The photos in this blog post were taken by Jess of Plays Well with Butter.
About Jessie Shafer
Jessie is a Registered Dietitian Nutritionist living near Denver, CO where she splits her time among nearby playgrounds, typing away at her trusty laptop, and heating up her home kitchen with delicious experiments. Her best taste tester is her husband, a Denver firefighter with a well-trained palate. A former magazine editor-in-chief, Jessie has a long career in food publishing and health writing. While she once played centerfield for the Northwestern University softball team, Jessie now prefers her fitness in the way of biking up mountain passes and chasing two busy toddlers (the latter proving to be the more exhausting activity).

