- Like
- SHARE
- Digg
- Del
- Tumblr
- VKontakte
- Flattr
- Buffer
- Love This
- Save
- Odnoklassniki
- Meneame
- Blogger
- Amazon
- Yahoo Mail
- Gmail
- AOL
- Newsvine
- HackerNews
- Evernote
- MySpace
- Mail.ru
- Viadeo
- Line
- Comments
- Yummly
- SMS
- Viber
- Telegram
- JOIN
- Skype
- Facebook Messenger
- Kakao
- LiveJournal
- Yammer
- Edgar
- Fintel
- Mix
- Instapaper
- Copy Link
I’m a rower – on water and in the gym. I regularly watch rowers and trainers work out on their rowing machines with growing frustration. Why am I frustrated?
Because they could be getting much better scores if only they knew one key technique.
Master the Rowing Machine
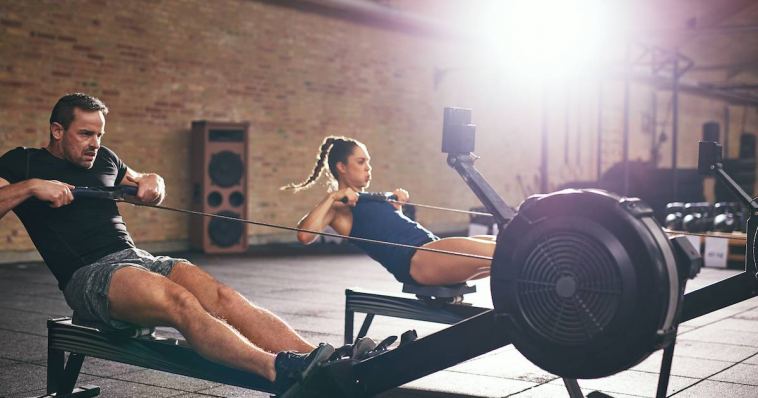
Go into the average gym, CrossFit, or a rowing club, and you will see a lot of great athletes using the rowing machines.
What difference does it make?
- The numbers
- The scores
- The 500 meter splits.
They are an order of magnitude different. Somehow those on-water rowers seem to coax more and more out of a rowing machine and leave most gym rowers for dead.
Two reasons why this happens:
- On-water rowers who use the rowing machines understand the concept of ratio and rhythm. This allows them to get more rest each stroke, thus allowing them to be more powerful because they’re getting less tired.
- On-water rowers know how to recruit extra muscles into their effort. The more muscles that are brought into the power phase, the more the flywheel accelerates, and the better the numbers.
The Basic Rowing Stroke
Rowing is comprised of two main parts:
- The Power Phase– In which you push against the footboard and accelerate the handle and chain towards you.
- The Recovery Phase– You rest and return to a bent-leg compressed posture with the chain retracted inside the machine.
An effective power phase uses legs, back, and arms to accelerate the handle and chain. So far, so good., but that isn’t what I’m seeing being done in the gym.
Most gym rowers fail to use their back muscles to accelerate the handle and chain.
This is a critical difference compared to the on-water rowers. This is what I teach my clients.
Add Back Power to your Rowing
First, learn which muscles to activate. Finding them and feeling these muscles, and knowing how to make them activate is probably the hardest part of this technique improvement.
Then, I would like to show you how to recruit them into your rowing stroke cycle and give you a drill to practice, which will enable you to add your back muscles into your rowing stroke.
Body Swing Only Rowing
On-water rowers learn technique and effective power using drills and exercises. And so I’m going to show you a drill called Body Swing Only Rowing.
- Let’s start by sitting on the rowing machine.
- Pick up the handle and sit with your legs straight, arms straight, and your body leaning forward.
- The key is that your shoulders are forward of your hips (use a mirror to check), and your neck and shoulders are relaxed.
On-water rowers call this position the catch position. It’s achieved by hinging through your hips with a straight back. If you have tight glutes and hamstrings, you may find this challenging.
If you cannot achieve this position, don’t do the exercise. You won’t gain anything until you can stretch forward in this posture.
Stage One
- Swing yourself backward until your shoulders are behind your hips.
- Leave your legs and arms straight. Then swing forwards again, and back moving the flywheel with the handle and chain as you swing.
- Try not to lean back further than 5-10 degrees.
- Now make the flywheel spin faster by gripping your abdominals just before you start the backswing.
A strong mid-section helps you connect your backswing to the handle and chain without any slippage.
Stage Two
- Add the arms to the backswing.
- Start swinging the back alone as in stage one, and then add an arm draw to keep the handle and chain accelerating as the handle comes close to your body.
- Then straighten your arms and swing forward from the hips.
- This sequence is important—arms before body swing.
- Keep working the swing-and-draw with a strong core to remove chain slippage so that when you start to move, the chain immediately accelerates the flywheel. Notice that you can do a tiny bit of backswing before you start the arm draw.
- This is important for activating the back muscles. You have to get larger muscle groups (legs and back) working before smaller muscles (arms) in rowing.
This is a critical skill for developing stroke power.
Stage Three
- Half the leg drive.
- Add a half leg drive. Rowers call this half-slide, and it’s when your legs are 50% towards being straight.
- Normally this is when your elbows are over your knees.
Stage one is the back. Add stage two, which is the arms, and then add stage three, the legs.
You are now moving the handle and chain faster because more body parts are accelerating the flywheel.
The critical component is the transition from one body part to the next.
Keeping this smooth and keeping the chain taut, and continuing to accelerate will give you the best results.
Stay focused on legs-back-arms and the reverse sequence when you return to start another stroke.
Learning this will reinforce the big muscles before the small muscles rule.
String It Together
Do the drill with 10 strokes at each stage. Then move to full slide and use a full leg drive; try to make the second half of your power phase feel like when you did the drill.
Use the mirror to check your posture. The first half of your power should be using only your leg drive. Check your torso is leaning forwards with shoulders forward from the hips. This is an unnatural posture and has to be learned – but it reinforces the big before small muscle rule, and that’s why it’s effective.
The last thing you can practice is rowing and try to finish your legs, back and arms simultaneously. This is an exaggeration from normal rowing technique – but it’s a good way to get a seriously powerful end of the rowing stroke.
And a good way to continue practicing or use it to do a 10 stroke power push during a workout when you want more power and that split to go down.
Next is learning that second thing… ratio and rhythm. But we’ll leave that for another day.


